
You've spent an evening drawing clean outlines, fixing a few awkward corners, and finally feel ready to add color. Then the alcohol marker touches the page. The black line softens, spreads into the paper, or stains the marker nib. A carefully finished sketch suddenly looks muddy.
That failure usually isn't caused by poor marker technique. It often comes from pairing an ink that was designed for dry paper with a solvent that can disturb it after it appears dry. The best art pens for drawing and marker line art aren't chosen by tip size alone. Ink behavior, paper, drying time, and nib control all matter.
| Drawing need | Pen type to consider | Main advantage | Main risk with alcohol markers |
|---|---|---|---|
| Precise construction lines | Technical fineliner | Consistent width and ruler-friendly control | Some formulas can still smear or feather |
| Fine details and small spaces | Needle-point liner | Crisp, narrow marks | Fine tips can catch on textured paper |
| Bold sketch outlines | Bullet-tip pen | Durable nib and confident coverage | Heavy ink flow may spread under repeated passes |
| Expressive comic work | Brush pen | Variable line weight | Flexible ink flow makes compatibility testing essential |
| Marker coloring with minimal line disturbance | Pigment-based liner | Usually stronger resistance to solvent movement | May feel less fluid than a dye-based pen |
The Hidden Challenge of Mixing Pens and Markers
You finish a clean outline, wait briefly for it to dry, and start laying a Copic or Ohuhu marker over the page. The black line suddenly spreads, turns grey at the edges, or stains the marker nib. A drawing that looked controlled in black and white becomes muddy during the first blend.
A waterproof label only describes resistance to water. Alcohol marker solvent can still soften or move that ink. The marker does not need to dissolve the line completely. Repeated passes may loosen colorant, push it into nearby paper fibers, or carry black residue into a pale marker tip.
The ink's chemistry matters, but so do the paper and the time between inking and coloring. Smooth marker paper can leave ink sitting on the surface while it dries. More absorbent paper pulls the line into its fibers, which can reduce surface smearing but may increase feathering. A pen that behaves well in a sketchbook can fail on a coated marker pad because the same ink has different access to the solvent.
Practical rule: Treat every new pen, marker brand, and paper combination as an untested system.
Generic pen guides often stop at nib width or a waterproof claim. Those details help you choose a drawing tool, but they do not answer the question that matters for alcohol marker line art: does the dried line stay crisp after the marker crosses it repeatedly? A pen can produce beautiful detail and still be a poor match for blending.
Technical pens began as drafting tools for engineers who needed needle-fine points and controlled marks. Current versions remain useful for dark, consistent line work with limited feathering or bleed-through. Many formats provide widths from 0.05 mm to 1.0 mm, as described in Dick Blick's guide to drawing pen types. Their predictable output makes them a sensible starting point, though no pen earns a place in a finished marker drawing without testing.
Why a finished drawing is the wrong place to experiment
A marker blend puts more liquid on the page than one quick stroke suggests. You may revisit a shadow, soften a transition, or correct an uneven fill. Every pass gives the solvent another chance to disturb the line underneath, especially where the ink remains near the paper surface.
Separate inking confidence from coloring confidence. First, check whether the pen gives you the width, darkness, and control your drawing needs. Then place the same marker over a sample line, using the number of passes you expect during a real blend. A pen that feels excellent for black-and-white work is not automatically suitable for alcohol marker work.
Pens have served as drawing tools for centuries. Britannica's overview of pen drawing describes pen drawing as one of the oldest Western drawing media and notes that steel pens developed in the nineteenth century helped replace quills through mass production. Modern pens offer more specialized choices, but the basic requirement remains practical: the tool must make a controllable mark, and that mark must survive the solvent used to color over it.
Understanding Ink Chemistry and Bleed Resistance
You finish a clean outline, lay down an alcohol marker, and watch the black line spread into a grey fringe. The problem is rarely the marker alone. Ink chemistry, drying time, paper, and the number of blending passes all affect whether a line stays sharp or feathers into the color.
The main distinction for marker line art is between dye-based ink and pigment-based ink. Dye-based ink contains colorants dissolved in a liquid carrier. It often flows smoothly and produces an even, saturated mark, but alcohol solvent can soften or move that colorant, particularly if the line is fresh or the marker crosses it repeatedly.
Pigment-based ink carries solid color particles in a liquid. After drying, those particles tend to remain anchored to the paper surface or fibers rather than re-dissolving as readily. That generally makes pigment liners a safer choice for alcohol-marker layering, although the result still depends on the specific formula, paper coating, drying conditions, and pressure used during coloring. For broader terminology around pen types and construction, see Jackson's guide to pens.
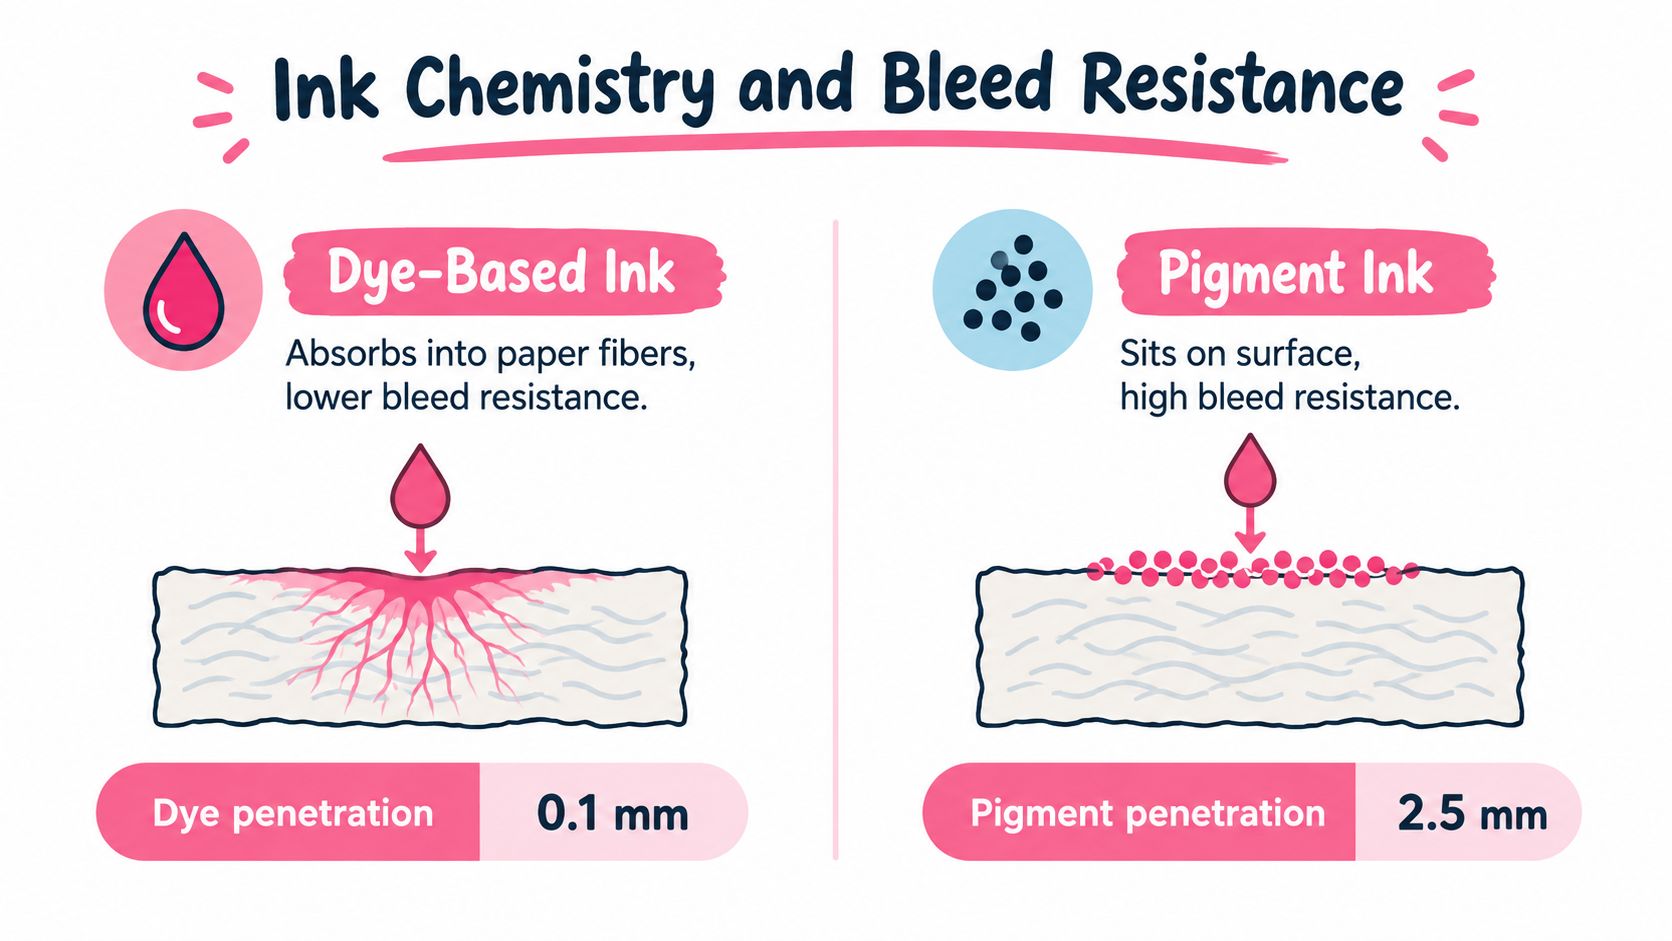
What the label can and cannot tell you
Packaging gives you clues, not a compatibility test. Check for:
- Pigment: A useful indication that the line may remain more stable during marker passes.
- Archival: A claim about long-term stability, not proof that the ink will resist alcohol solvent.
- Water-resistant or waterproof: Helpful for water media, but not conclusive for alcohol markers.
- Acid-free: More relevant to paper and conservation than to immediate solvent behavior.
A smooth-flowing dye-based pen can be excellent for loose sketches, construction lines, and quick studies. It may also bleed when you revisit a shadow or soften a color transition. Pigment-based fineliners can feel less fluid and may require more deliberate strokes, but they are usually the better starting point when a dark outline must remain separate from blended color.
Test the actual combination before committing a finished drawing. Draw several lines, let them dry fully, then apply the marker with the same number of passes you expect in the artwork. Test both a single crossing and a saturated blend. A pen that survives one pass may still feather after repeated layering.
The reverse choice can be deliberate. A water-soluble or easily disturbed line can merge with a wash or create a softer edge, but it is poorly suited to crisp alcohol-marker coloring. Choose the formula according to the intended result: the line should either stay separate from the color or participate in it.
Comparing Tip Sizes and Nib Shapes for Line Art
A fine liner may survive a single marker pass yet feather when you build a shadow beside the same line. Tip shape affects that risk because it controls how much ink reaches the paper, how evenly the line is deposited, and how much pressure the hand applies. Choose art pens for drawing by the movement and line hierarchy your style needs, not only by the smallest number printed on the barrel.
| Nib type | Common sizes | Best for | Marker compatibility note |
|---|---|---|---|
| Needle-point technical liner | 0.05 mm, 0.10 mm, 0.20 mm, 0.30 mm, 0.40 mm | Architecture, technical illustration, tiny details | Test carefully on rough paper, where the tip may catch and deposit uneven ink |
| Bullet tip | Fine to broad widths | Sketching, strong contours, repeated handling | A durable choice for pressure, but a wet-flowing formula may feather under marker passes |
| Brush pen | Fine to broad variable strokes | Manga, comics, expressive contours, organic texture | Flexible lines can carry more ink, so dry time and solvent testing matter |
| Broad drafting point | Up to about 1.2 mm in some sets | Large outlines and graphic shapes | Use on a test strip first, especially where marker layers will overlap |
A 0.05 mm point gives tight control, but it is not automatically the cleanest choice. On toothy paper, the tip can snag, skip, or wear down, leaving broken ink that alcohol marker solvent spreads into the surrounding fibers. A 0.20 mm or 0.30 mm line may stay more consistent because it keeps steadier contact with the surface. The wider line also gives you more visible separation from a blended color area.
Needle points for controlled structure
Needle-point fineliners suit measured drawings and detailed construction. They work well with rulers, templates, repeated architectural edges, small eyes, hair strands, hatch marks, and narrow coloring-book spaces. Their fixed width helps keep a complex drawing readable when marker color is layered around the line.
The trade-off is sensitivity to pressure and paper texture. Pressing harder can force extra ink into a snag, creating a dark spot that later blooms when the marker crosses it. Keep the grip light and let the tip move at a steady pace. On rough stock, use a slightly wider point if the finest nib repeatedly catches.
Bullet tips for durable sketching
Bullet tips tolerate a firmer hand and repeated page handling. They suit gesture sketches, bold cartoon outlines, and quick studies where a delicate point would catch or feel too slow. Their rounded shape lays down a more forgiving mark across uneven paper.
Line hierarchy needs planning. A bullet tip can make small details and outer contours look equally heavy, flattening the drawing. Pair a fine bullet tip for interior marks with a broader outline pen, or reserve the bullet for contours that need to remain visible beneath marker blending. Check the ink load as well. A wet dye formula may feather farther from a bullet line than from a controlled technical liner.
Brush pens for movement
Brush pens create variation through pressure and direction. A light stroke can taper into a heavier contour, giving hair, fabric, limbs, and action poses more energy than a fixed-width liner. They are useful when the line itself carries expression rather than merely defining an edge.
That range makes marker compatibility less predictable. The start of a brush stroke may contain a dense patch of ink, while its taper contains very little. Alcohol solvent can disturb those two areas differently, producing a dark halo in one place and clean blending in another. Use brush pens where expressive variation matters, then test the exact ink, paper, and marker combination before committing to a finished page.
Testing Pen and Marker Compatibility
A clean outline can fail the moment an alcohol marker crosses it. Test every pen and marker pairing on the paper intended for the finished illustration, because sizing and surface coating affect drying, pooling, feathering, and solvent movement.
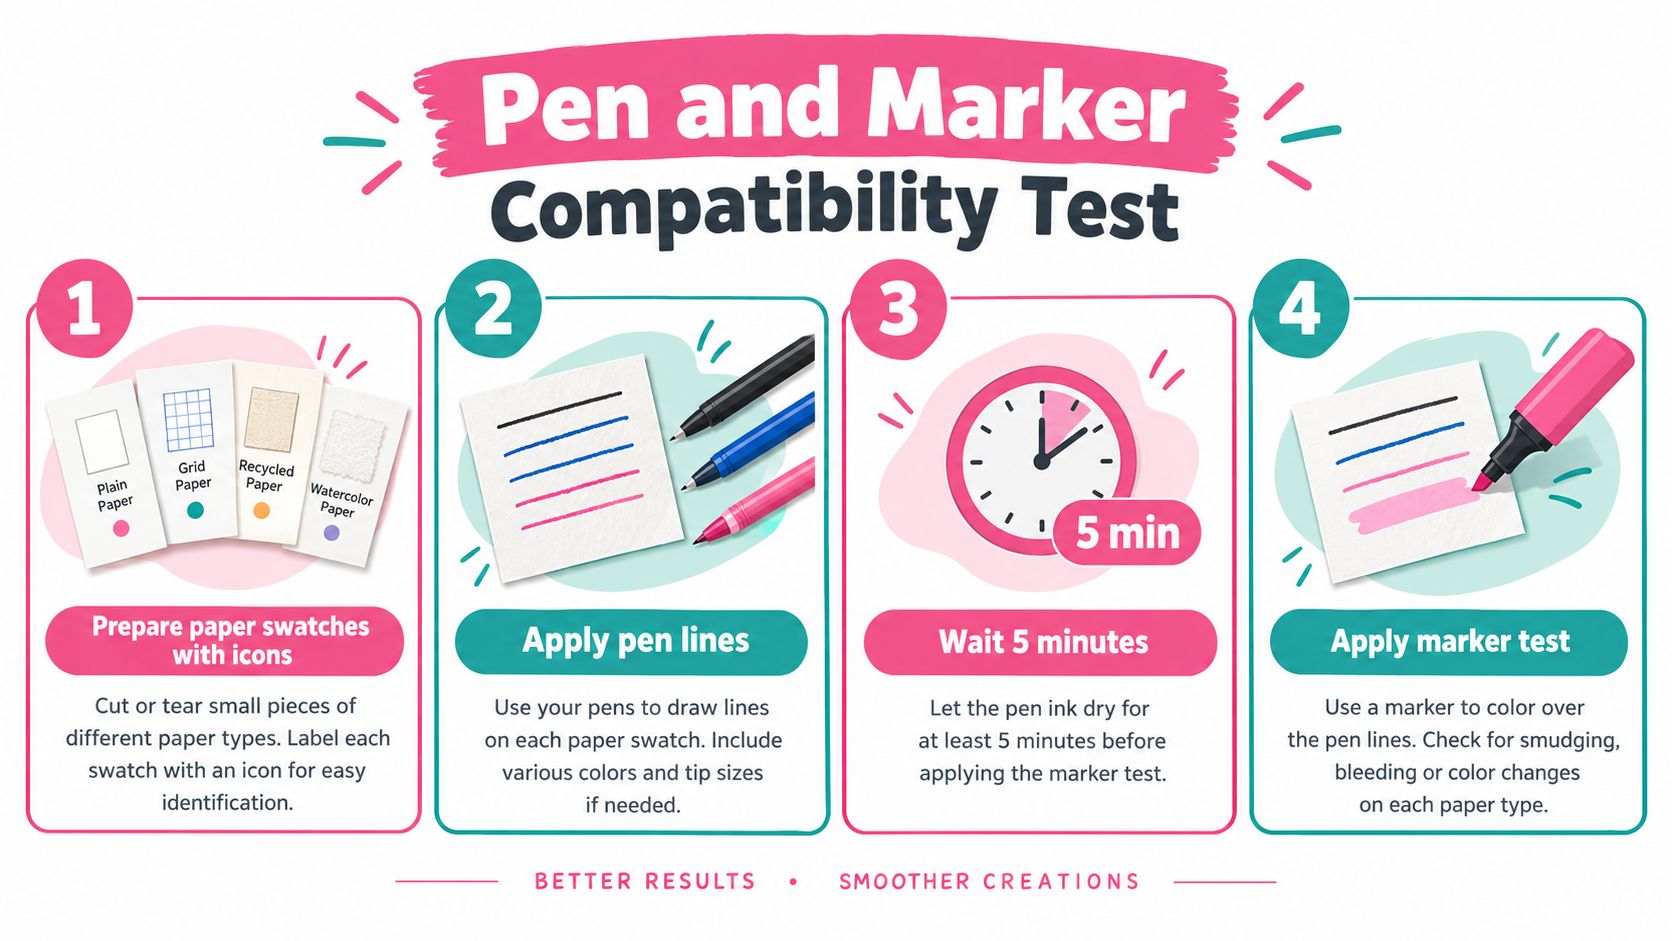
Build a useful swatch grid
Reserve a sheet of working paper and label each test with the pen name, nib size, marker color, and application method. Include a fine line, crosshatching, a curved contour, and a filled black patch. A dense area exposes problems that a single outline can hide, especially when alcohol solvent reactivates or carries excess ink.
Use one repeatable sequence:
- Apply the pen lines. Match the pressure and speed used in your normal drawing. Heavy pressure deposits more ink and can create a wider reaction zone.
- Leave the lines undisturbed. The infographic uses a five-minute wait as a consistent starting point. Test a shorter or longer delay too if you usually color soon after inking or leave pages overnight.
- Add a single marker pass. Cross the lines, fill beside them, and pull the marker through the black patch. Watch whether the nib picks up dark ink.
- Layer the marker. Repeat the pass where you would build a shadow or blend. Repeated solvent exposure can soften an outline that survives the first pass.
Record the result precisely. Check for feathering, a softened edge, black transfer onto the marker nib, or a pale halo around heavy marks. A line can remain technically intact while still staining a light marker or losing the crisp boundary needed for clean blending.
Check the front and back of the sheet
Inspect both sides. Bleed-through, pooling, and saturated paper on the back show that the marker load exceeds what the sheet can contain. A backing page protects the next sheet, but it does not repair a muddy front or stop solvent from disturbing the outline.
Test the pen alone as well. Rub a dry finger across a line, then compare it with a marker-covered line. The difference separates ordinary smudging from movement caused by alcohol solvent. Repeat the grid whenever you change the paper, marker brand, or pen formula.
Keep a small compatibility library: Save successful swatches with the pen, paper, and marker names beside them. A proven sample is more reliable than remembering how a pairing behaved.
Use the marker comparison tool to organize marker choices before testing. The physical swatch still determines whether the selected line art pen blends cleanly on your paper.
Tailoring Pen Choices to Specific Art Styles
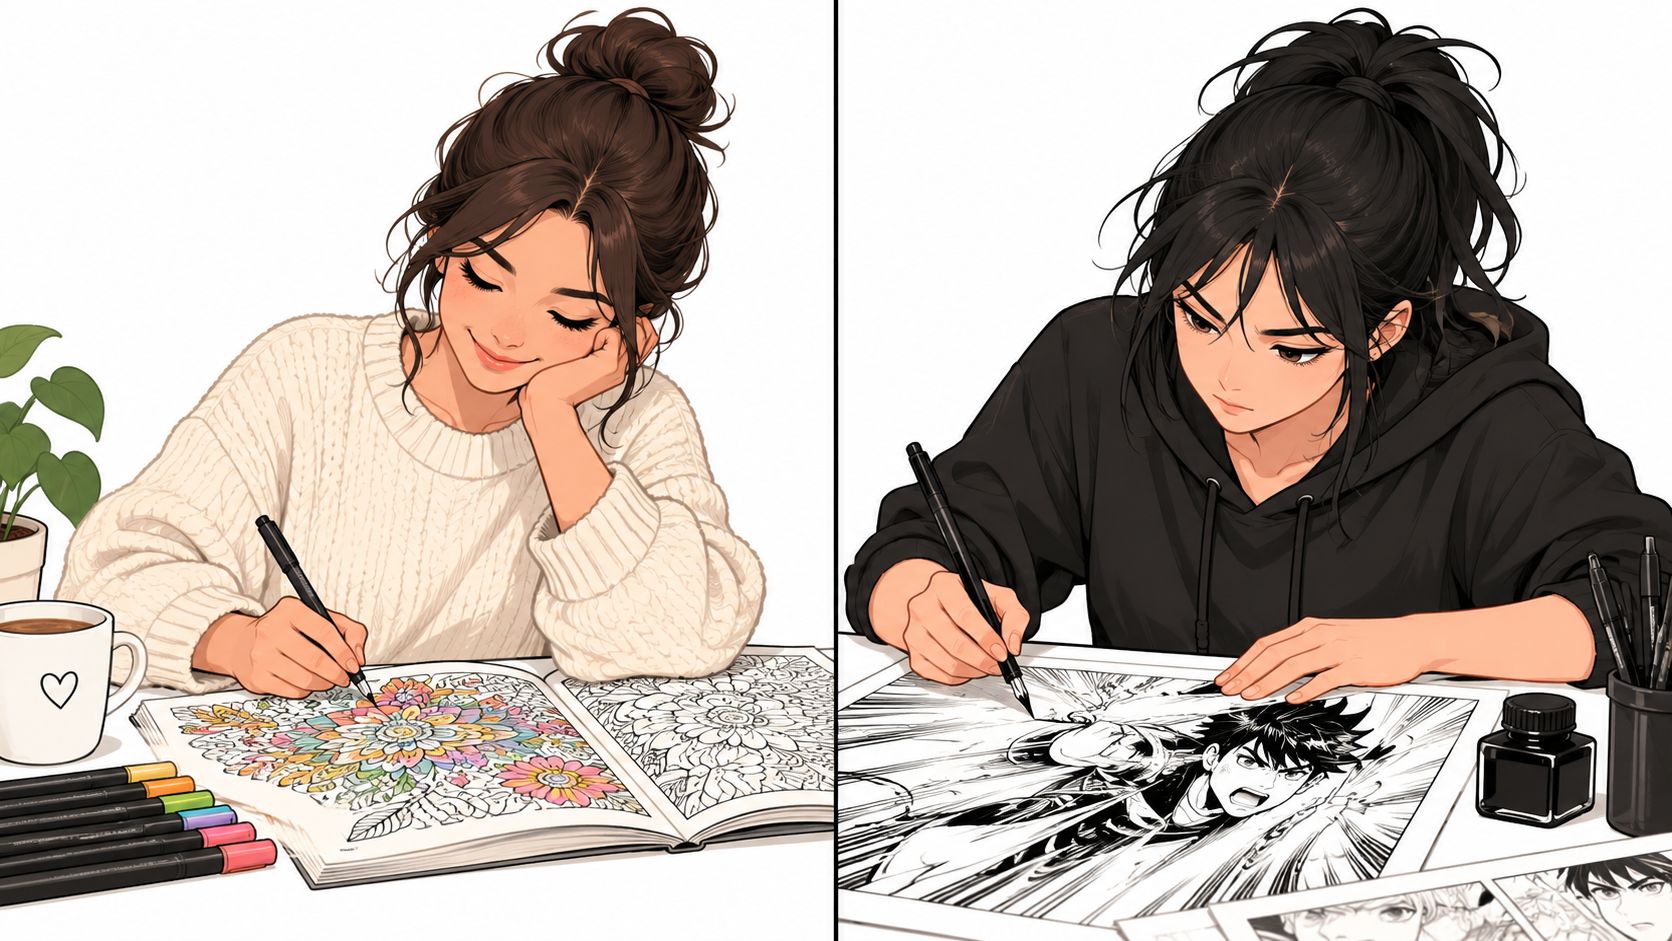
A “good black pen” behaves differently in a technical diagram, a manga panel, and a coloring book. The right choice depends on how much line variation the style needs, how tightly you work, and whether alcohol marker solvent will soften or pull the ink.
Technical illustration
Use a fixed-width technical liner when edges, labels, diagrams, or measured forms carry the image. A narrow point handles interior details, while a broader size can separate the main silhouette from secondary information. A ruler-friendly tip usually matters more than dramatic variation in stroke weight.
Alcohol markers can expose weak ink formulas quickly. Test the liner on the exact paper, then apply the marker in the same layers you use for finished work. A stable outline should remain crisp while the marker builds the values. Dense black fills can overpower a technical drawing, so reserve them for emphasis instead of choosing the broadest nib by default.
Manga and comic inking
Expressive inking benefits from a brush pen or another flexible nib. Vary pressure to build contour weight, place heavier lines where forms overlap, and use finer strokes for texture or distant details. A fixed fineliner still earns a place for panel borders, facial details, lettering guides, and controlled hatching.
The ink formula matters as much as the nib. A brush stroke can deposit more ink than a narrow technical line, giving alcohol solvent more material to disturb. Let it dry fully, then test a light marker pass and a second pass over the same area. If the marker picks up black or creates a gray feather along the edge, change the pen, reduce the ink load, or keep the marker away from that contour.
Refillable systems suit artists who ink frequently and have already confirmed the formula on their preferred marker paper. They reduce repeated purchases, but cleaning and consistent handling become part of the workflow. Disposable or cartridge-based tools are easier to manage, though they can produce more waste over time.
The following video is useful for observing how a more expressive nib changes line character during sketching:
Hobby coloring and cozy illustration
Coloring-book artists generally benefit from consistent lines. A fine pigment liner can define small sections without constant pressure adjustments, leaving the marker palette to provide most of the visual weight.
Choose a pen that stays subordinate to the coloring. Broad outlines can close narrow spaces and make a gentle palette appear harsh. For neighboring areas that need clean separation, test whether the marker can touch the line without pulling black into the fill. This check matters especially with pale colors, where a small amount of transferred ink becomes obvious.
A compact setup is often enough: one fine detail pen, one medium contour pen, and a marker palette proven on the same paper. Add a brush pen only when variable outlines serve your style. Buying every nib type before identifying your workflow creates clutter rather than useful control.
Planning Colors Before Committing Ink to Paper
A marker blend can expose a color decision before it exposes a drawing mistake. A dark shadow may require several passes, and each pass increases the chance that alcohol ink will soften, pull, or feather a nearby outline. Plan the palette before committing line art so the pen and marker work together rather than compete.
Preview the mood and the ink load
A digital mockup can test a warm skin palette, a cool nighttime scheme, or a muted interior without putting marker on paper. It also reveals muddy combinations before you spend ink. Use the preview to check:
- Will the outline stay clear beside the darkest fill?
- Do adjacent regions remain distinct after blending?
- Does the focal area have the strongest contrast?
- Are shadows describing form rather than darkening every section?
Screen color will not match a physical marker exactly, so treat the preview as a relationship check, not a color proof. A shade that looks balanced in a small swatch may overwhelm the line art when spread across a large shape.
A palette generator can help assemble candidate combinations before you open the marker case. Keep those choices beside a test sheet, then make physical swatches with the actual markers. Record how many passes each region needs and whether the ink remains clean after blending over or beside the line.
Assign each color a job
Choose a base marker, a shadow marker, and a transition color for every major region. If a blend needs repeated passes, test the same sequence on scrap paper first. Alcohol ink can re-wet or disturb a pen line even when the first marker stroke appears harmless, particularly along narrow contours and tight corners.
Keep the final plan simple. Manga and concept work may need a stronger contour where a dark background reduces separation, while a pale subject can retain lighter interior treatment and an airy line hierarchy. Coloring-book pages benefit from clear value differences between neighboring sections, so similar marker families should not be placed side by side without testing.
Mark the planned order beside the swatches: base first, shadows next, and softening passes last. This prevents improvisation over permanent lines and shows whether the chosen pen survives the actual marker routine. The reliable workflow is the one that confirms palette, pass count, and ink behavior before the finished page receives color.
Building Your Ultimate Line Art Toolkit
A practical toolkit starts with the pen and marker combinations that survive your actual workflow. Build around the line problems you encounter most often, then add tools only when they create a different mark or solve a different blending risk.
Use this buying checklist
- Choose the ink first. For alcohol marker line art, start with pigment-based ink or a formula tested with your markers. “Waterproof” alone does not guarantee resistance to alcohol ink.
- Match the nib to the motion. Use a fixed point for controlled detail, a bullet tip for steady sketching, or a brush tip for varied expressive lines.
- Carry complementary widths. Pair a fine detail pen with a medium contour pen. This usually gives clearer hierarchy than several nearly identical sizes.
- Test the paper pairing. Keep swatches of every pen and marker combination that behaves consistently.
- Inspect the nib. Replace a damaged fine tip. Pressing harder can spread ink, widen the stroke, and increase feathering.
- Store pens properly. Follow the maker's storage guidance, secure the caps, and do not leave inked tips exposed.
- Separate wet and finished work. Let fresh lines dry before stacking pages or applying marker blends.
A smaller kit that survives repeated alcohol-marker passes beats a large set filled with incompatible formulas. Test narrow contours, corners, and layered shadows, because a line that stays clean under one pass may bleed when alcohol ink re-wets it. Keep physical swatches as your final reference. If you are building a palette around one brand, a Decotime and Ohuhu converter can help translate colors between systems.
Test before you commit. Ink chemistry controls bleed resistance, nib shape controls the mark, paper controls feathering, and color order controls how often the line is disturbed. Confirm those four variables on scrap paper before working on the finished drawing.
ColorBestie converts uploaded black-and-white sketches into marker-style color previews and suggests colors for systems including Ohuhu and Copic. Use ColorBestie to review palette ideas before art pens and alcohol markers touch the final page.
