
You know the moment. The sketch is finally right. The jawline sits where it should, the hair shape behaves, the hands don't look cursed, and your clean draft is sitting on cheap sketch paper while your good marker paper waits untouched beside it.
That's where most transfer mistakes happen. Not because the idea is hard, but because the stakes feel high. Alcohol marker paper shows everything. Press too hard and you emboss grooves into the sheet. Use the wrong transfer layer and your pale skin tones pick up dirty gray. Rush the setup and the whole drawing shifts half a millimeter, which is enough to make line art feel off.
Learning how to use transfer paper solves that bottleneck, but generic tutorials usually stop at “put paper underneath and trace.” That's not enough for marker artists. Smooth paper, blending-friendly surfaces, light line preservation, and clean ink behavior all change the way you should transfer.
This guide is for that exact problem. It covers manual graphite transfers, printable heat and iron-on sheets, and the little technique decisions that matter when your final surface needs to stay clean. If you plan palettes digitally before committing to ink, tools like ColorBestie can help at the sketch stage too, but the transfer itself still comes down to pressure, alignment, and choosing the right method for the surface in front of you.
From Sketchbook to Final Paper an Introduction
A finished transfer should feel invisible. You shouldn't be thinking about it while you color. You should just have clean, placed lines on the right surface, ready for marker.
That sounds simple until you're moving artwork from one paper to another. A rough pencil sketch often has energy but not enough polish. A refined drawing often lives on the wrong stock. A printed digital sketch may be perfect in proportion, but printing directly onto marker paper isn't always possible or wise. So artists end up stuck in the gap between a strong draft and a usable final sheet.
For marker work, that gap matters more than people admit. Alcohol markers reward smoothness. They also punish damage. If your transfer leaves waxy residue, dark graphite, or indented channels, your nib catches those flaws and your blends show them. Skin gradients, soft shadows, and clean anime-style fills all depend on a surface that hasn't been roughed up before the first marker stroke.
A clean transfer is part of the coloring process, not just prep work.
Transfer paper gives you a way to preserve the drawing without redrawing it from scratch. Sometimes that means classic graphite paper under a printed line drawing. Sometimes it means rubbing a soft pencil onto the back of your sketch and tracing over it. Sometimes it means a printable transfer sheet for fabric or merchandise rather than paper.
The method changes with the surface, but the principle doesn't. Control the alignment. Control the pressure. Keep the guide lines as light as the finished piece allows.
If you've ever ruined a good marker page before coloring even started, this is the fix.
Choosing Your Transfer Method and Tools
You finish a sketch you love, place clean marker paper underneath, trace it, and realize too late that the guide lines are too dark for pale skin tones. Or worse, you press hard enough to leave grooves, and every alcohol marker pass settles into them. The transfer method caused the problem before coloring even started.
That's why tool choice matters more for marker artists than it does for many other mediums. Smooth marker paper shows everything. Residue, pressure marks, and muddy transfer lines all stay visible once ink hits the page.
Three methods that behave very differently
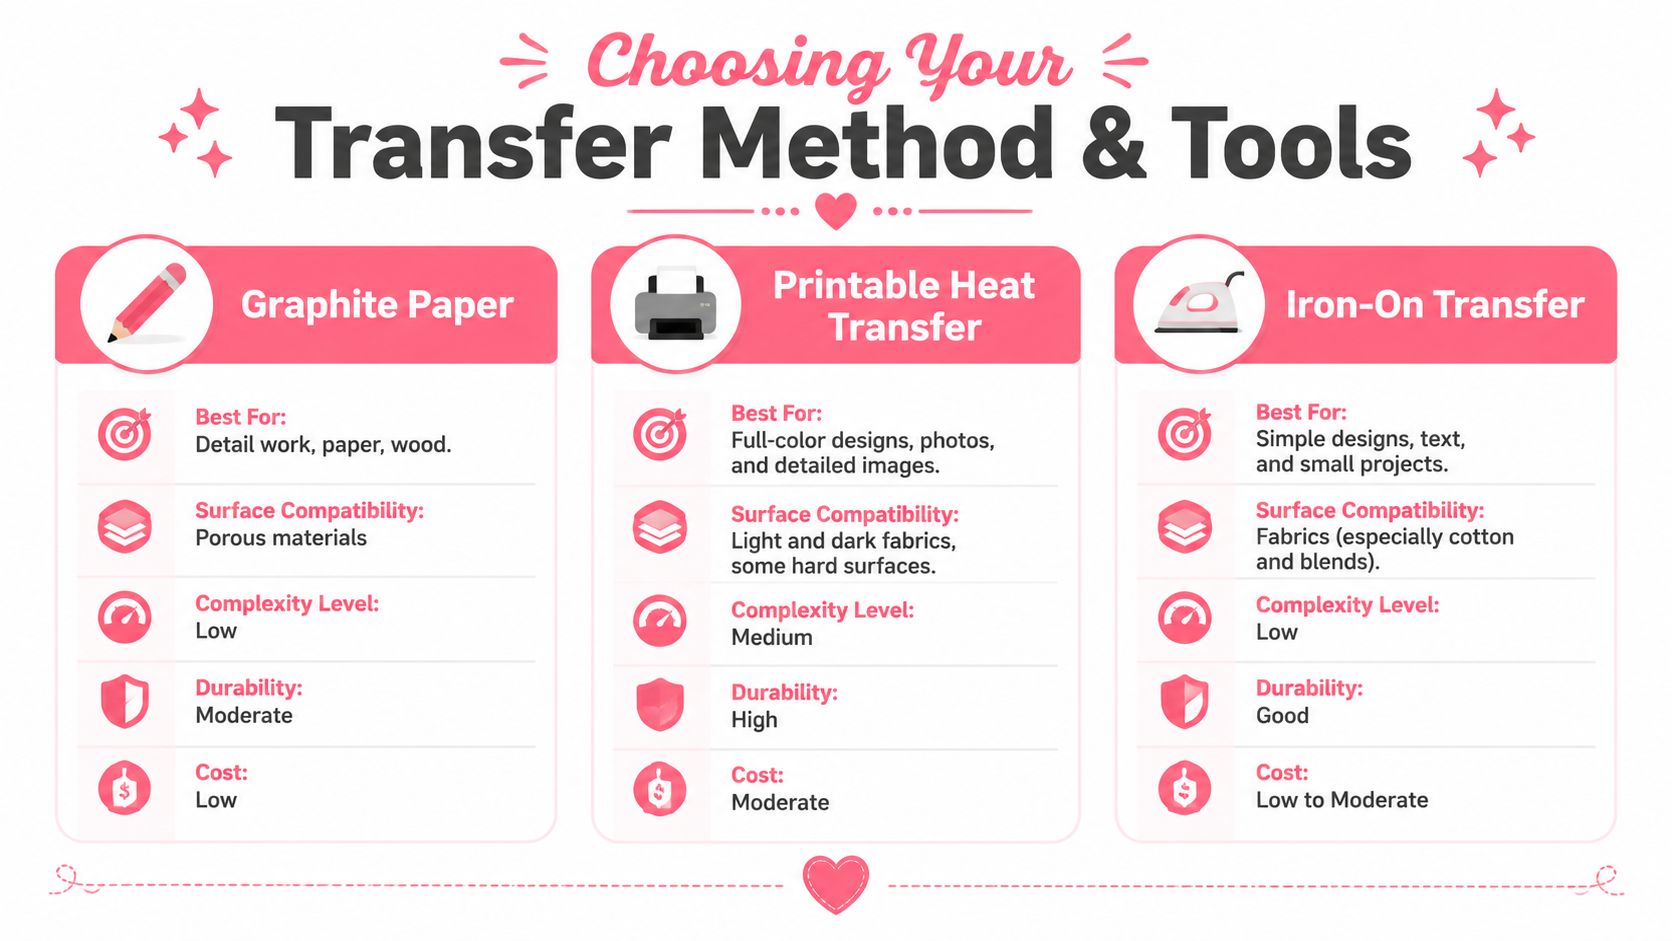
Here's the comparison I use before I start:
| Method | Best for | What it does well | Where it can go wrong for marker artists |
|---|---|---|---|
| Graphite paper | Paper art, illustration boards, smooth surfaces | Precise placement, controlled detail, usually easier to lift than wax-heavy transfer sheets | Heavy pressure creates dark lines and dents that show through marker layers |
| DIY graphite back | One-off illustrations, custom tracing, low-cost studio use | Inexpensive, easy to make, softer transfer if you keep the graphite layer light | Loose graphite smudges during setup and can dirty your hand or page |
| Printable heat transfer | Fabric, tote bags, shirts, merch, polyester or cotton depending on paper type | Moves digital art onto textiles without hand tracing | Wrong tool for marker paper, and results depend on heat settings, pressure, and peel timing |
| Iron-on transfer | Home fabric projects and simple apparel customization | Easy to try with common tools | Fabric-focused workflow, not a drawing transfer solution for finished marker art |
A lot of artists buy generic carbon paper and expect it to behave like artist-grade graphite transfer paper. The difference is obvious once markers come out. Waxy sheets can resist ink, stain the surface, or leave lines that never fully clean up.
For marker work, graphite-based options are usually the safer starting point. They give you more control over line weight, they erase more cleanly, and they are less likely to fight your blends later. That matters on ColorBestie-style artwork where soft gradients, pastel palettes, and clean cel-shaded fills leave very little room to hide a messy transfer.
Transfer paper also branches into two separate jobs. One branch is for illustration surfaces. The other is for fabric and product printing. Both are useful, but they solve different problems, so choosing the wrong family of materials creates frustration fast.
A practical tool kit for clean transfers
The basic kit is small, but each item solves a specific problem marker artists run into.
- Painter's tape or low-tack tape holds registration without tearing smooth paper.
- A stylus, empty ballpoint, or hard mechanical pencil gives you a sharp tracing point without adding extra graphite on top.
- A kneaded eraser lifts excess transfer gently, which matters on coated or delicate marker sheets.
- Scrap marker paper lets you test pressure and line visibility before you touch the final piece.
- A hard backing board keeps the transfer consistent and reduces patchy, broken lines.
- A printer and tiled printout help when your sketch is digital and the final size has to stay exact.
I also recommend matching your transfer lightness to the marker palette you plan to use. If the piece depends on pale values, low-contrast shadows, or very smooth skin blends, your transfer needs to be lighter than you think. The marker comparison tool is useful for checking how different marker sets handle those softer ranges before you commit to a line transfer.
Practical rule: choose the transfer method based on the final surface and the sensitivity of the markers you'll use on it.
For marker paper, manual graphite transfer is usually the cleanest choice. For fabric, printable or iron-on transfer products make sense. Mixing those jobs up is where a lot of avoidable problems start.
Mastering Manual Tracing with Graphite Paper
Manual tracing is still the most flexible option for illustration work. It's quiet, cheap, and precise. Its primary benefit is its ability to transfer only what you need. You can skip construction lines, leave out uncertain areas, and preserve the final sheet for actual line work instead of repeated erasing.
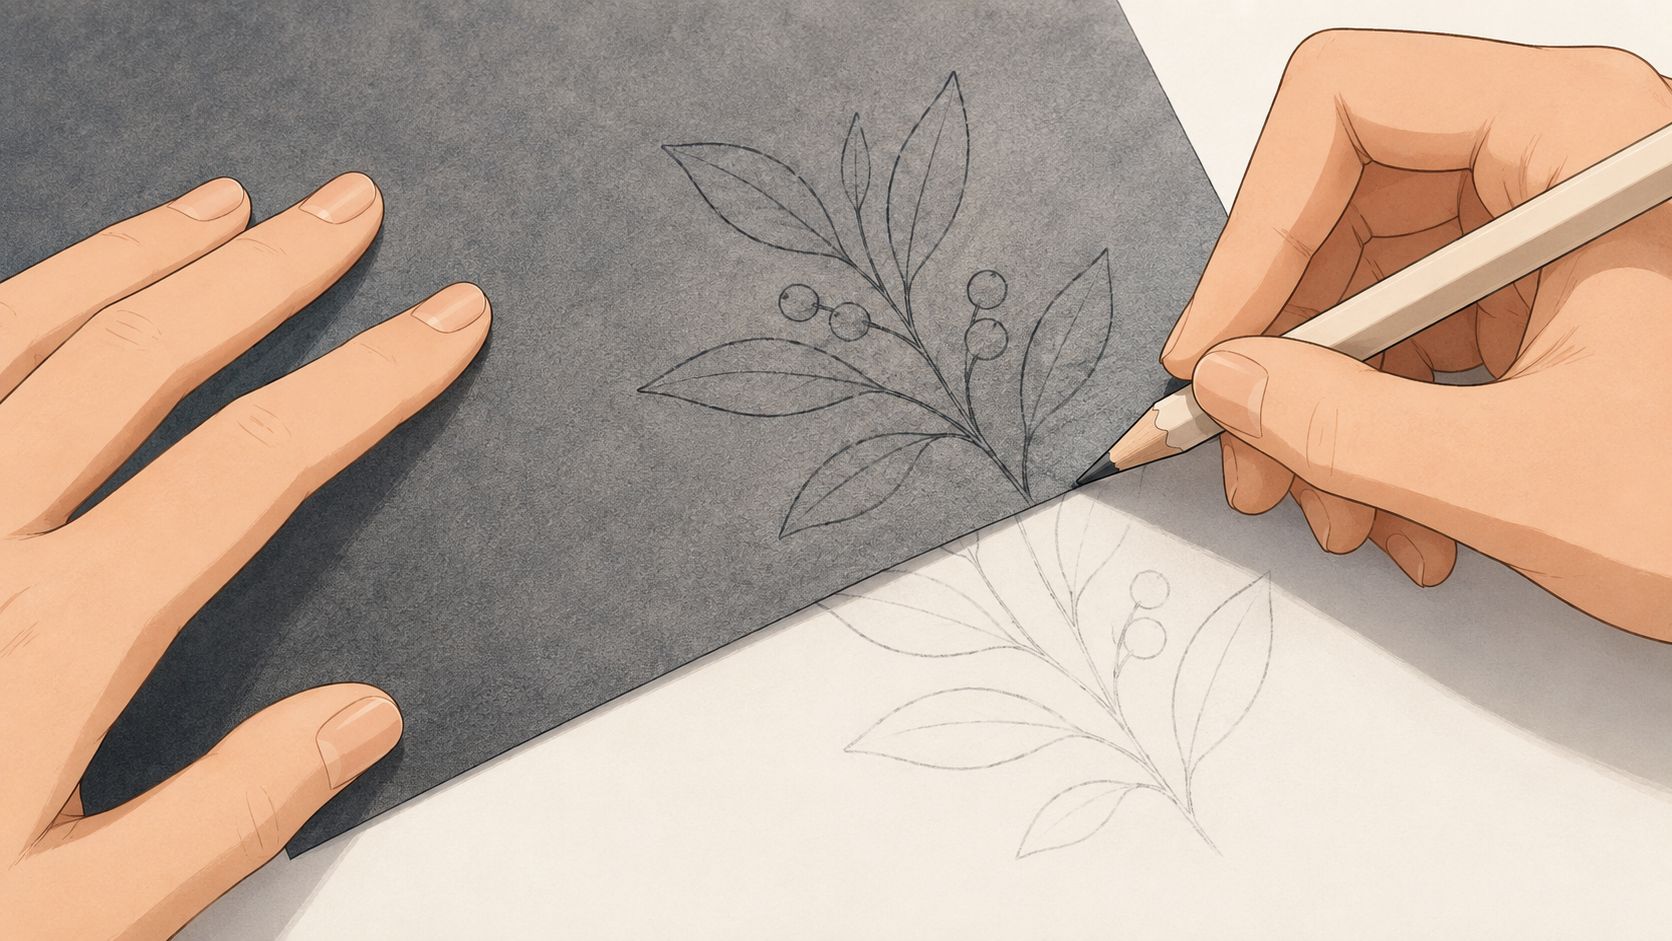
Build a stable transfer sandwich
The cleanest manual transfers come from a layered setup. I think of it as a sandwich with no slack in it.
Bottom layer
Put down your final marker paper on a hard, flat surface.Middle layer
Place the graphite paper transfer-side down.Top layer
Add your sketch or printout at the correct position.
Then tape the stack. Don't just tape one corner and hope for the best. Secure at least the top edge so you can lift and check without losing alignment.
One manual transfer method specifically recommends using tape to create registration marks before inserting the transfer paper, then tracing with firm, even pressure to prevent incomplete transfer. It also suggests doing a quick corner lift before full removal so you can catch missed spots early, as shown in this registration and tracing demonstration.
How to trace without denting marker paper
Marker artists need a lighter hand than most general craft tutorials suggest. “Firm” does not mean forceful. It means consistent.
Use a stylus or empty ballpoint and trace in a steady motion. If you bear down too hard, the line transfers, but so does a groove. That groove may not look dramatic until you start blending with a brush nib and feel the tip riding a trench.
Try this instead:
- Start with outer contours so you can check placement early.
- Use even pressure, not maximum pressure. Broken transfer lines are easier to patch than embossed paper.
- Work in sections by lifting a taped corner now and then.
- Trace only essential lines. Transfering every sketchy hatch mark usually creates clutter.
A good transfer should look a little underdone when you first remove the top sheet. That's fine. You can reinforce the visible lines later with your final inking tool or fineliner. What you don't want is a dark, engraved map sitting under transparent marker layers.
If you can feel the line with your fingertip, you probably pressed too hard.
A hard table or drawing board matters here too. Manual transfer quality changes fast when the base has any give. A cutting mat is usually fine. A stack of sketchbooks, lap desk cushion, or folded towel is not.
The DIY graphite-back method
If you don't have transfer paper, you can make a usable substitute with a soft graphite pencil. This is handy for one-off illustrations and small studio corrections.
Here's the cleanest version of that method:
- Cover the back of your sketch with an even layer of soft graphite.
- Don't make it shiny. A heavy graphite patch smears more easily.
- Flip the drawing over onto your final sheet.
- Tape it in place.
- Trace from the front with a stylus or pen.
The benefit is control. You decide how light or dark the transfer layer is. The downside is mess. If the graphite on the back is too thick, your fingers can move it onto the final paper while you work.
A few habits help:
| Problem | Better move |
|---|---|
| Back of sketch feels slick with graphite | Dab excess with scrap paper before tracing |
| Palm smudges the sheet | Slide a clean paper guard under your hand |
| Transfer is too faint | Retrace only missing sections instead of restarting |
| Marker paper gets dirty edges | Trim or mask the working area before taping |
This method is especially good when you want faint guide lines for faces, hair placement, or comic panel layouts and don't need a full dark transfer.
For most marker artists, manual graphite transfer remains the most forgiving route. It gives you placement without locking you into heavy lines, and that's exactly what smooth alcohol marker rendering needs.
Using Printable Heat and Iron-On Transfer Paper
Printable heat transfer paper belongs in your workflow when the final artwork is meant for fabric, not marker paper. If you turn illustrations into shirts, tote bags, convention samples, or small-batch merch, this method can save time. It also asks for a different kind of precision than studio tracing.
For alcohol marker artists, the main adjustment is file prep. Marker art often includes soft blends, pale skin tones, and subtle shadow edges that look great on paper but can print flatter on fabric. Before you commit to transfer paper, clean up dust, check contrast, and test whether your lightest colors still read. If you need to tighten a palette before printing, a marker-friendly color palette generator can help you spot muddy transitions before they end up on a shirt.
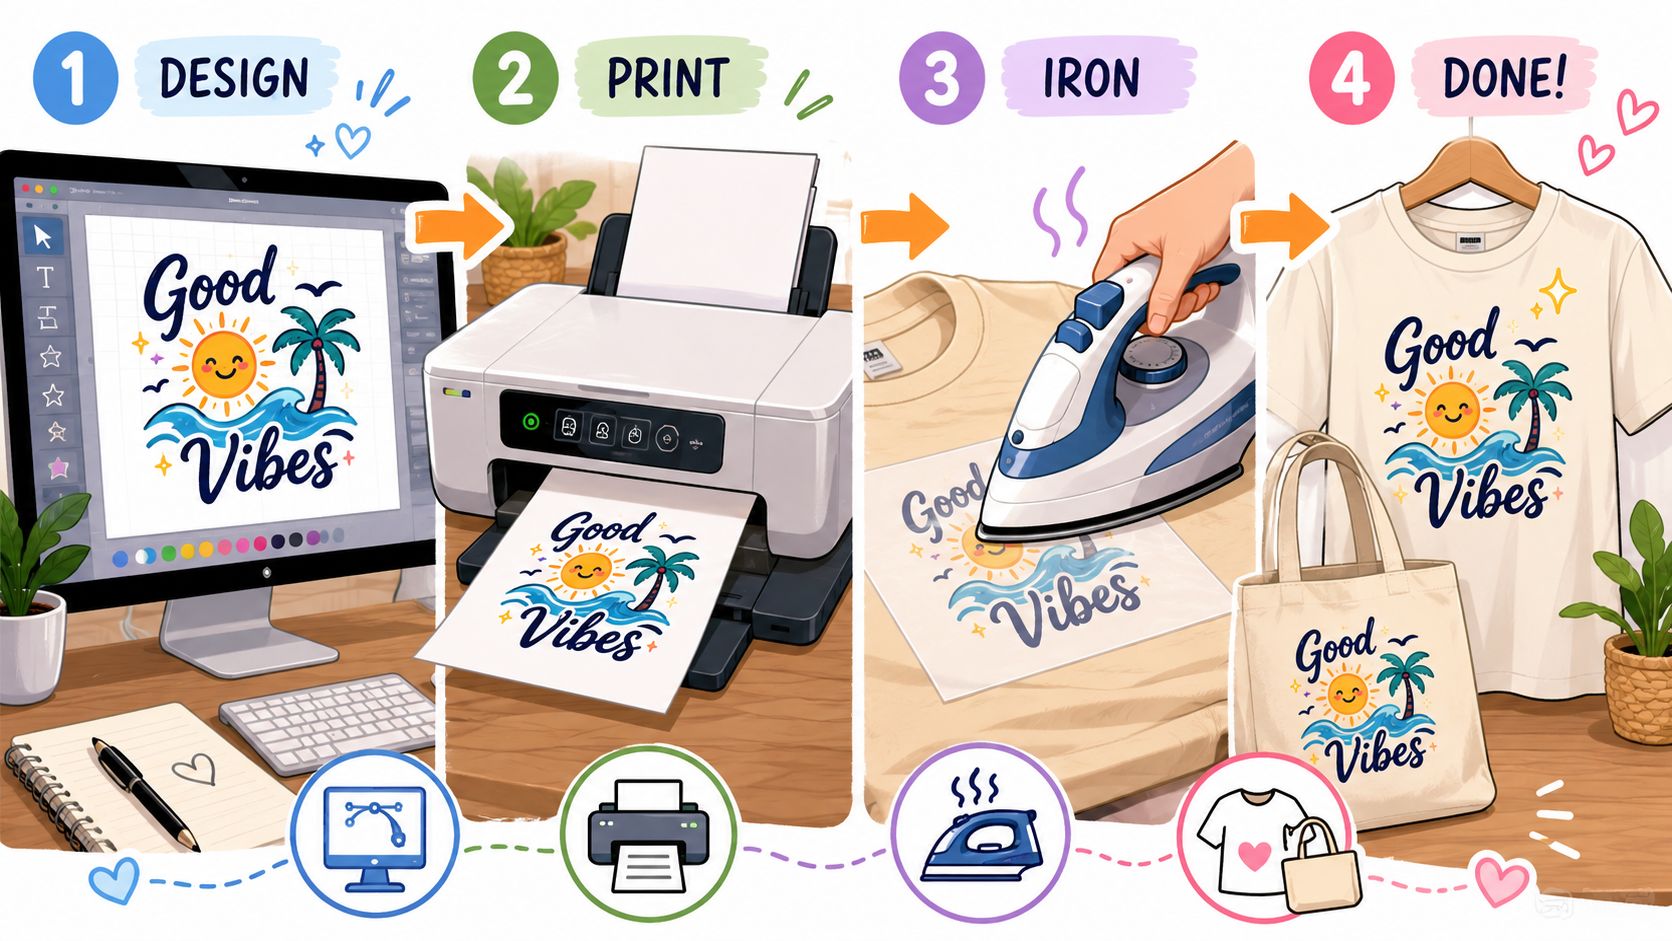
Prepare the file and the fabric first
Start by checking orientation. Some transfer papers need a mirrored print, especially if the printed side is placed face-down on the fabric. Skip that step and any text, handed pose, or directional design will print backward.
Fabric prep matters just as much. Pre-wash if the manufacturer recommends it. Then press the fabric flat before applying the transfer. Residual sizing, moisture, and wrinkles interfere with contact, and poor contact shows up fast as patchy adhesion or weak edges.
A practical iron-on workflow stays fairly consistent across brands: prep the fabric, print in the required orientation, place the transfer on a firm heat-safe surface, apply the recommended heat and pressure, then peel according to the sheet instructions. If you want a brand-by-brand walkthrough, this iron-on transfer workflow guide lays out the basic order clearly.
Heat settings and material choices
Bad transfers usually come from mismatched settings, not bad drawing.
Standard inkjet transfer paper for cotton generally uses lower heat and shorter press times than sublimation systems for polyester. Sublimation needs polyester or a polymer-coated surface, plus higher heat and firmer pressure. Inkjet iron-on paper is easier for artists testing merch at home, but it is also less forgiving if your iron runs unevenly or your pressing surface has soft spots.
That trade-off matters in practice:
- Inkjet transfer paper on cotton is accessible and good for short runs, gifts, and test pieces.
- Sublimation on polyester holds detail and color well, but only works on the right material.
- Dark garments often need opaque transfer paper or a different print method than light garments.
Household irons can work for simple projects, but a calibrated heat press gives more repeatable results. I would only trust an iron for prototypes or one-off pieces. If you plan to sell marker-based apparel, consistency matters more than convenience.
A quick visual walkthrough helps if you're trying this for the first time.
Peel timing and aftercare
Peel timing changes the result. Some papers want a hot peel. Others need to cool first. Pulling too early can stretch the film or lift corners. Waiting too long on a hot-peel sheet can make release rough and uneven.
Follow the sheet instructions exactly. This part is less forgiving than sketch transfer on paper.
After pressing, let the item rest if the manufacturer calls for it. Wash inside out. Skip harsh heat on the first wash. Marker artists already know that delicate surfaces punish rough handling, and fabric transfers are no different. The cleaner your prep and the calmer your process, the better your artwork survives wear.
Pro Tips for Perfect Lines on Marker Paper
Marker paper asks for restraint. That's the main difference. On regular sketch paper, a rough transfer can be corrected with more drawing. On coated or smooth bleed-resistant sheets, every extra pass risks scuffing the surface you need for blending.
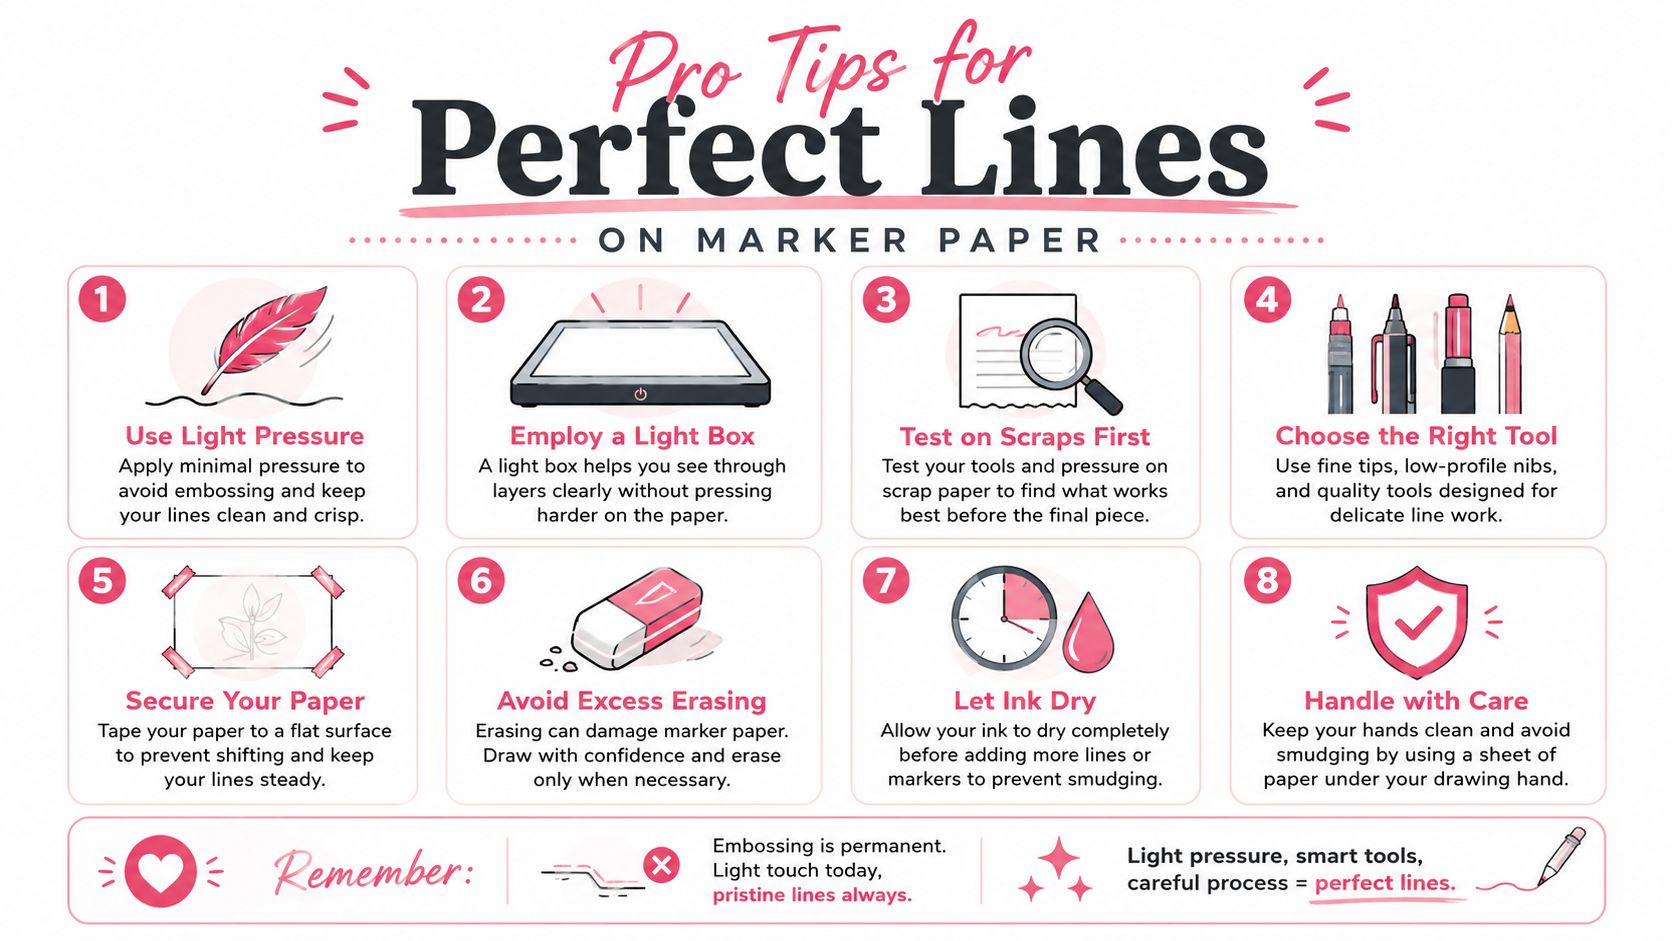
Keep the transfer visible but quiet
The best transfer lines for alcohol markers are barely there. You want enough visibility to guide your fineliner or coloring decisions, but not enough to stain the lightest parts of the piece.
That means two things:
- transfer lightly
- reduce the line again before coloring
A kneaded eraser is the tool for this. Don't scrub with a vinyl eraser. Press and lift. Dab the line until it fades to a soft guide. This preserves the paper tooth and avoids roughening the coating.
For skin, clouds, white clothing, highlights, and pale neutral backgrounds, this step matters a lot. Graphite that looks harmless at the tracing stage can turn muddy under a peach marker or a colorless blender pass.
Soft guide lines are easier to ink over than dark transfer lines are to hide.
Protect the paper surface before color goes down
Technique matters more than product choice more often than artists expect. One overlooked point in transfer instruction is surface firmness. A flat, firm base gives cleaner results, while a squishy one weakens line quality and makes pressure less predictable. Peel timing can also change by project, with some materials preferring hot peel and others cold peel, as noted in this surface-specific transfer guidance.
For marker artists, that translates into a few studio habits:
- Work on a rigid board rather than a soft pad or stack of paper.
- Test pressure on scraps first using the same marker paper brand.
- Keep your tracing point narrow but smooth so it glides rather than digs.
- Avoid re-tracing the same path repeatedly because that's how grooves get carved.
- Separate transfer from inking. Don't try to perfect the artwork during the tracing pass.
If a marker nib starts catching when you color, the problem often began long before the marker touched the page. It usually started in transfer with pressure that was just a little too aggressive.
Use color planning to reduce rework
A lot of paper damage comes from indecision, not just heavy tracing. Artists transfer too many interior details because they aren't sure what they'll keep once color is involved.
Planning proves helpful. If you already know which shapes need crisp separation and which areas will merge with color, your transfer can stay cleaner. You don't need to map every fold in a coat if broad marker values will handle it better.
For that stage, a digital preview tool like the palette generator can help you test marker-style color relationships before the final sheet gets touched. That isn't a transfer tool. It's a planning aid. But it can reduce how much information you feel compelled to push onto the paper.
Try thinking in layers:
| Stage | What belongs there |
|---|---|
| Transfer | Placement, contours, essential structure |
| Ink | Final line confidence, edge hierarchy |
| Marker | Volume, temperature, mood, texture shifts |
When artists mix all three jobs into the transfer step, the page gets overworked before coloring begins.
The cleanest marker pieces usually start with the lightest possible guide.
Troubleshooting Common Transfer Disasters
Most failed transfers aren't ruined by the paper itself. They're ruined by mismatch. Wrong pressure for the surface, wrong transfer type for the medium, wrong release timing, or a setup that moved halfway through.
When the transfer looks dirty
Smudgy transfer lines usually come from one of three things. The transfer layer was too heavy, your hand dragged loose graphite across the page, or the paper type left a waxy residue that doesn't clean up well.
Fix it by lifting excess material with a kneaded eraser instead of rubbing. If the lines still feel greasy or resist marker cleanly, switch materials next time. Marker paper tends to tolerate light graphite far better than heavier wax-based transfer marks.
When lines break or disappear
Broken lines often tempt people to press harder everywhere. That usually makes the next attempt worse.
Instead, check the setup:
Was the base firm enough
A soft surface reduces transfer completeness.Did the layers shift
Use tape and registration marks so the drawing returns to the same position if you need to recheck.Was your pressure even
Light in one area and heavy in another creates patchy results.
A faint transfer is repairable. An indented sheet isn't.
When heat transfers peel or crack
If a printable fabric transfer starts lifting, don't assume the sheet was defective. Process errors are common. Temperature, time, pressure, peel timing, and fabric prep all have to match the product.
The practical fix is to go back through the workflow in order. Confirm the fabric was pre-washed and pre-ironed. Confirm the design orientation matched the paper. Confirm the application surface was hard and heat-resistant. Then confirm that your peel timing matched the product instructions. Many failures that look mysterious are just one skipped prep step.
The paper gets blamed first, but the technique usually deserves the first inspection.
Transfer work gets easier fast once you stop treating it as a single skill. It's really a set of smaller choices. The right sheet, the right surface, the right pressure, and the right amount of restraint for the final medium.
If you want a calmer way to plan marker colors before you transfer or ink, ColorBestie lets you upload a sketch and preview marker-style color ideas based on palette, mood, style, lighting, and genre. It fits nicely into the stage before the final sheet comes out, when you're deciding what deserves a line and what color can handle instead.