You've finished the sketch, sized the canvas, and are holding the drawing just above that clean primed surface. Your hand pauses because one bad decision can leave graphite showing through pale acrylic, smear into an alcohol marker nib, or force you to repaint a section that was already working. The difficult part of transferring paper to canvas isn't tracing an outline. It's choosing a transfer that won't argue with the medium you plan to use next.
That choice has a long history. The Getty Museum's overview of traditional transfer techniques describes methods including pricking and pouncing, tracing, squaring, and incising. These approaches helped artists preserve composition while moving a drawing from paper onto another support, and the same principle still applies in a modern studio. Your finish should decide your transfer, not the other way around.
Why the Transfer Method Matters More Than Your Tracing Skill
A beautifully traced drawing can still fail if the transferred material remains active on the surface. Graphite may look harmless beneath an opaque acrylic base, but a marker nib can pick it up and drag it into a light area. Carbon paper can leave a darker, greasier mark than you intended. A gel transfer may preserve a delicate line without rubbing, yet create a smoother sealed patch that behaves differently from the surrounding canvas.
That mismatch becomes obvious when the final medium is unforgiving. Alcohol markers carry dye in alcohol-based solvent, so they can disturb loose surface pigment and reveal every weak spot in your preparation. Transparent acrylic layers create a different problem. They may allow an overly dark underdrawing to remain visible instead of covering it.
Think backward from the finished surface
Before you print, shade, tape, or brush on medium, answer three questions:
- What will go on top? Opaque acrylic, transparent acrylic, oil, watercolor, colored pencil, and alcohol markers each expose different weaknesses.
- How much texture must remain? A heavily toothy canvas needs a method that doesn't require forceful tracing.
- How permanent should the drawing be? A temporary construction line calls for a light, controllable deposit. A collage-like image may benefit from a bonded transfer.
The safest workflow is finish-first planning. If the final image depends on soft marker blends, prioritize a clean, sealed, lightly marked surface. If you're building opaque acrylic shapes, you have more tolerance for a graphite or carbon outline. If the original sketch is irreplaceable, avoid a process that abrades it or requires repeated handling.
Studio rule: A transfer is part of the paint system. Treat it as an underlayer with consequences, not as disposable scaffolding.
Paper-based transfer also has a conservation history, not just a studio history. The Getty's conservation history of canvas transfer records use in Naples since the eighteenth century, later avoidance in nineteenth-century museums, and renewed use in the early twentieth century. A Burlington Magazine study documents paper's role in the transfer of The Raising of Lazarus, where its use was identified in 1958. The lesson is practical: transferring an image has always involved choices about support, adhesion, and what remains beneath the visible finish.
Choosing the Right Transfer Method for Your Finish
No transfer method wins every job. Graphite and carbon paper are fast and inexpensive, but they leave a physical deposit that may smear or contaminate a marker. Gel medium protects the original drawing from tracing pressure and creates a bonded image, but it changes the surface. Grids preserve the paper reference and avoid transfer residue, while heat methods can be quick but demand careful control.
| Method | Best For | Risk Under Alcohol Markers | Line Fidelity | Skill Required |
|---|---|---|---|---|
| Graphite paper | Acrylic, colored pencil, light construction lines | Nib can lift loose graphite | High for clean outlines | Low |
| Carbon paper | Strong outlines under opaque paint | Dark residue may smear or show through | High | Low |
| Transfer paper | Controlled line weight and repeatable tracing | Depends on pigment and surface seal | High | Low to moderate |
| Gel medium | Delicate sketches, collage effects, solvent-exposed layers | Low once fully bonded, but surface may repel ink | High, with a transferred texture | Moderate |
| Grid method | Rescaling without transfer residue | No direct residue risk | Depends on drawing accuracy | Moderate |
| Heat transfer | Toner or graphite image transfer on primed surfaces | Heat and surface changes can affect ink behavior | Moderate to high | Moderate |
Match the tool to the medium
For opaque acrylic, graphite, carbon, or standard transfer paper is usually practical because later paint can cover construction lines. Oil painting can also tolerate a transferred outline, provided the surface is compatible and the marks are secured before brushwork. Colored pencil benefits from very light graphite or a grid because heavy transfer marks can remain visible beneath translucent layers.
Watercolor is a poor match for a dark, greasy transfer. Use the lightest possible graphite, or rely on a grid and erase construction lines before applying washes. Alcohol markers need the most discipline. A sealed, low-residue line is safer than a soft, powdery one, and a smooth gel transfer may need testing because marker ink can behave differently on sealed areas.
If your reference needs color planning before you commit to canvas, ColorBestie's palette generator can help you explore a marker-friendly direction from a sketch or reference. That doesn't replace a surface test, but it can reduce the temptation to redraw after you've already transferred.
What trade-offs actually matter
The grid method preserves the original and leaves no transfer pigment, but you must keep proportions consistent while rescaling. Heat transfer can preserve a drawing without direct tracing, yet uneven pressure or excessive heat can damage the surface. Gel medium gives the most integrated result, though it requires patience and a fully prepared support.
Choose based on the failure you can least afford. If residue is unacceptable, use a grid. If pressure could damage the canvas tooth, use gel medium. If speed matters and the final paint is opaque, graphite or carbon paper may be the sensible option.
Graphite and Carbon Paper Transfer Step by Step
Graphite transfer is simple, but it rewards precision. Most ruined transfers come from two causes, a reference that shifted and pressure that was far too heavy. The paper-to-canvas transfer guidance from Art-is-Fun also emphasizes exact sizing, correct sheet orientation, tight taping, and a mechanical pencil for controlled pressure.
Prepare the drawing and surface
Print or photocopy the reference at the exact final size. Measure the canvas with a ruler and compare the reference dimensions instead of aligning it by eye. If the composition must be mirrored, reverse the reference before printing, especially when lettering or directional details matter.
Cut the graphite or carbon sheet to the same dimensions as the drawing. Identify the transfer side before placing it. The dark or messy side must face the canvas, with the clean paper side against the back of the reference.
Check the surface before you begin. Raw canvas absorbs and grips differently from gessoed canvas, so test in an edge area or on a scrap prepared in the same way. A transfer that looks light on paper may become harder to remove once it settles into a porous ground.
Tape for alignment, not decoration
Place the reference over the canvas and secure it with low-tack painter's tape. Use all four corners, then add tape at the midpoint of each edge. Keep the layers flat and tight, but don't stretch the canvas aggressively. Loose tape allows the paper to creep during tracing, while excessive tension can distort the placement.
Lift one taped edge like a hinge and slide the transfer sheet underneath. Check the orientation again. Then close the reference and press the taped layers down without rubbing across the drawing.
Trace with controlled pressure
Use a sharp mechanical pencil or a hard graphite pencil in the 2H to 4H range. These grades help keep the line lighter than a soft 2B deposit. Trace the primary contours first, then major internal divisions. Don't chase every texture mark. The transfer is a guide for the painting, not a second finished drawing.
Test your pressure on a corner before committing. You want a visible line that sits on the surface, not an embossed groove that crushes the canvas tooth. If the line is too faint, reinforce only the essential areas after lifting the paper.
Remove the reference slowly, keeping the layers flat as you peel them back. Inspect the entire canvas before moving on. Missed lines are easy to correct now, but trying to reconstruct them after paint has begun usually creates unnecessary clutter.
Gel Medium and Heat Transfer for Delicate Sketches
When tracing pressure would flatten a textured surface, or when the original ink drawing must remain untouched, a contact transfer is safer. Gel medium and heat transfer both move the image without asking you to press a stylus through every contour, but they work through different kinds of adhesion.
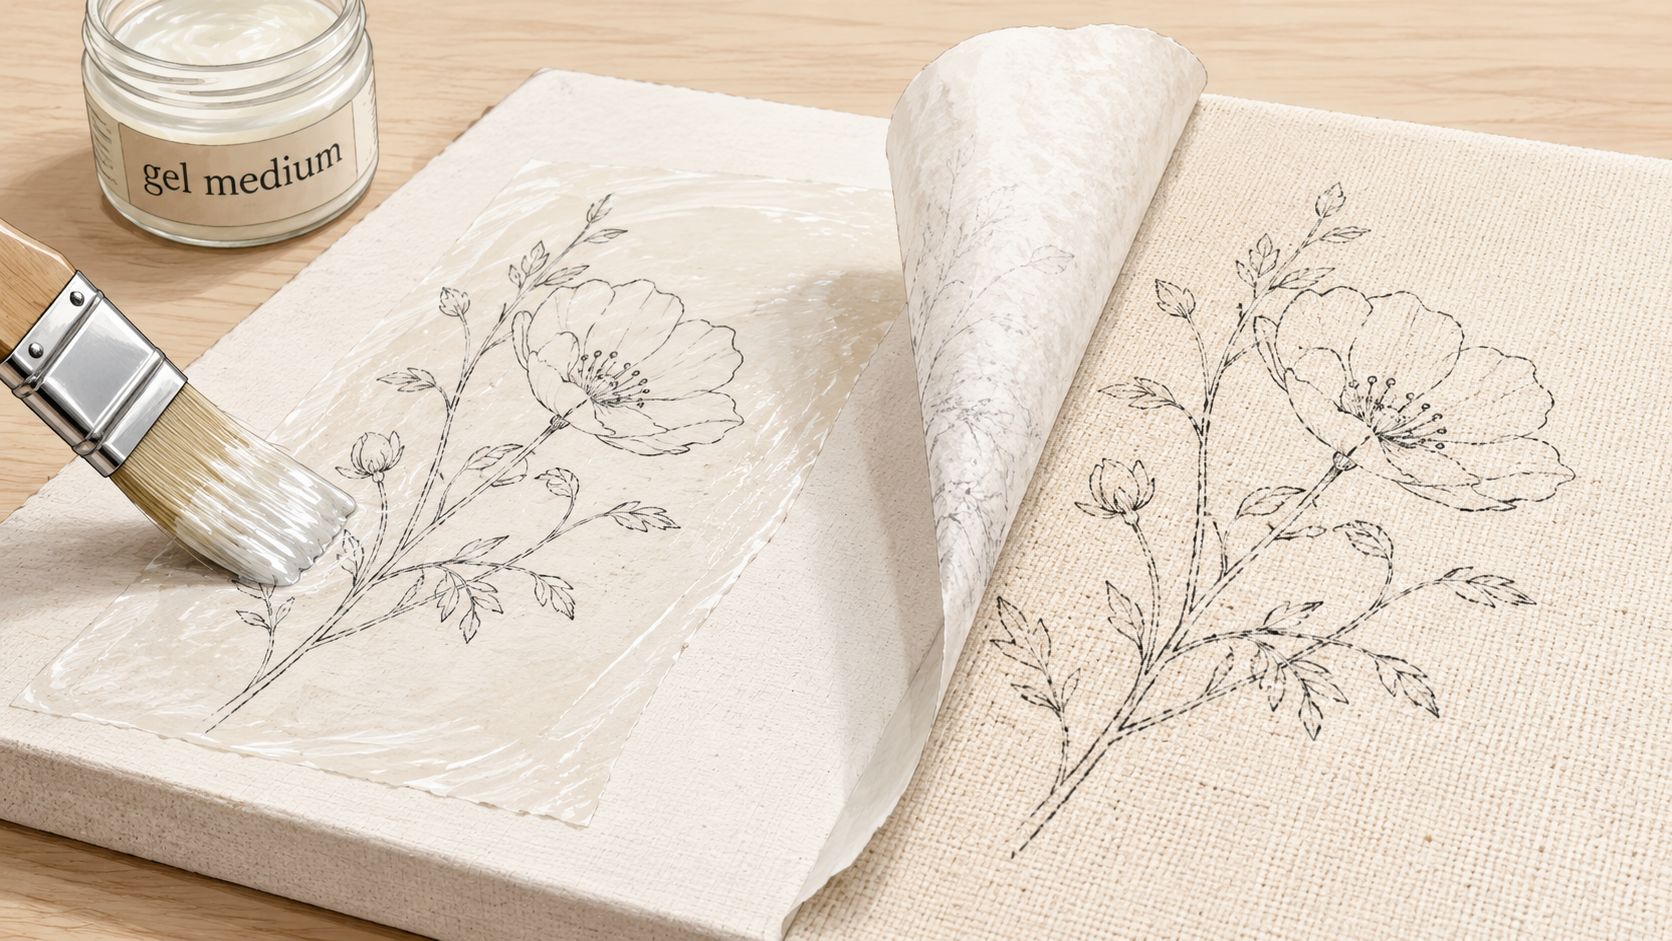
Gel medium transfer
Use a fully primed, dry canvas. Raw cotton can absorb the medium before it forms a reliable image-transfer layer, while gesso gives the acrylic medium a more stable surface to bond with.
Brush on a thin, even coat of matte or gloss acrylic gel medium. Avoid heavy-body gel because its thickness makes paper placement and burnishing less predictable. Place the sketch face-down into the wet layer, then smooth from the center outward with a plastic card. Work out air pockets without sliding the paper.
Let the piece cure completely before adding water. The supplied workflow calls for 8 to 24 hours of curing, with the longer end safer when the layer is thick or the room is cool. Mist the paper, wait for it to soften, and roll the pulp away gently with your fingertips. Rub in small passes. If the image begins lifting, stop, let the area dry, and return with less water and lighter pressure.
Heat transfer
For heat transfer, use a laser-compatible toner image or soft graphite drawing on tracing paper. Place the image side down on the primed canvas, cover it with parchment, and iron using medium heat for 30 to 60 seconds in overlapping passes. Keep the iron moving rather than parking it on one spot.
Heat is the pressure source here, so consistency matters. Too little contact produces broken lines. Too much heat can alter the primed surface or scorch the paper. Let the transfer cool before lifting one corner, then peel the tracing paper back slowly and in a low, shallow direction.
Both methods preserve delicate line fidelity better than forceful tracing on a rough surface. Neither should be trusted without a corner test. The final medium still determines whether the altered surface will accept marker, acrylic, or another layer evenly.
Prepping the Canvas for Alcohol Markers After Transfer
Alcohol markers expose poor preparation quickly. Loose graphite can transfer to the nib, thin gesso can allow dye to spread sideways, and a sealed patch can make ink bead while the surrounding canvas absorbs it. The surface needs enough tooth to hold the marker while remaining controlled enough for clean blends.
Build a stable ground
Start with two coats of acrylic gesso, allowing each coat to dry before sanding lightly with 220-grit abrasive. The aim isn't to polish the canvas smooth. You're evening out ridges and loose texture so the marker doesn't catch unpredictably.
Blick Premier and Fredrix Acid-Free gesso are reasonable starting points for testing. Some marker artists prefer Golden Absorbent Ground for greater ink control, followed by a sealing layer. The choice matters less than consistency. Use the same canvas preparation on your test scrap as on the final piece.
Avoid flooding a stretched canvas with thick gesso. Heavy buildup can swallow fine transfer lines and may become vulnerable when the support flexes. A lightly absorbent, properly primed surface gives you a better balance than either raw fabric or a glossy plastic-like film.
Lock the underdrawing before coloring
Once the transfer is dry, apply one light pass of workable fixative or a diluted matte medium. A practical starting mixture is roughly 1 part medium to 3 parts water, but test it because different grounds and mediums change the result. Let the layer dry fully before using a marker.
The seal should lock the line, not bury the texture. A thick coat can make alcohol ink skate or bead, which is as frustrating as a smudging underdrawing. Use a pale marker on a test corner first, then check whether the nib picks up pigment.
For marker planning, ColorBestie's marker comparison tool can help you compare compatible marker families and color choices before you place ink on the prepared canvas. It's useful at the planning stage, but it can't predict how a specific marker will behave on your particular gesso and sealant.
Marker rule: Seal first, test second, color third. Don't discover surface contamination in the middle of a blend.
Apply marker work only after the seal is dry. If you plan to varnish, allow the alcohol to off-gas for 24 hours before applying the finish. Keep the final coating compatible with the marker manufacturer's guidance and test it on a separate sample.
Troubleshooting Smudges, Ghosting, and Lifting Lines
Transfer failures usually leave recognizable evidence. Diagnose the symptom before adding another product, because the wrong fix can bury the problem under a thicker, less workable surface.
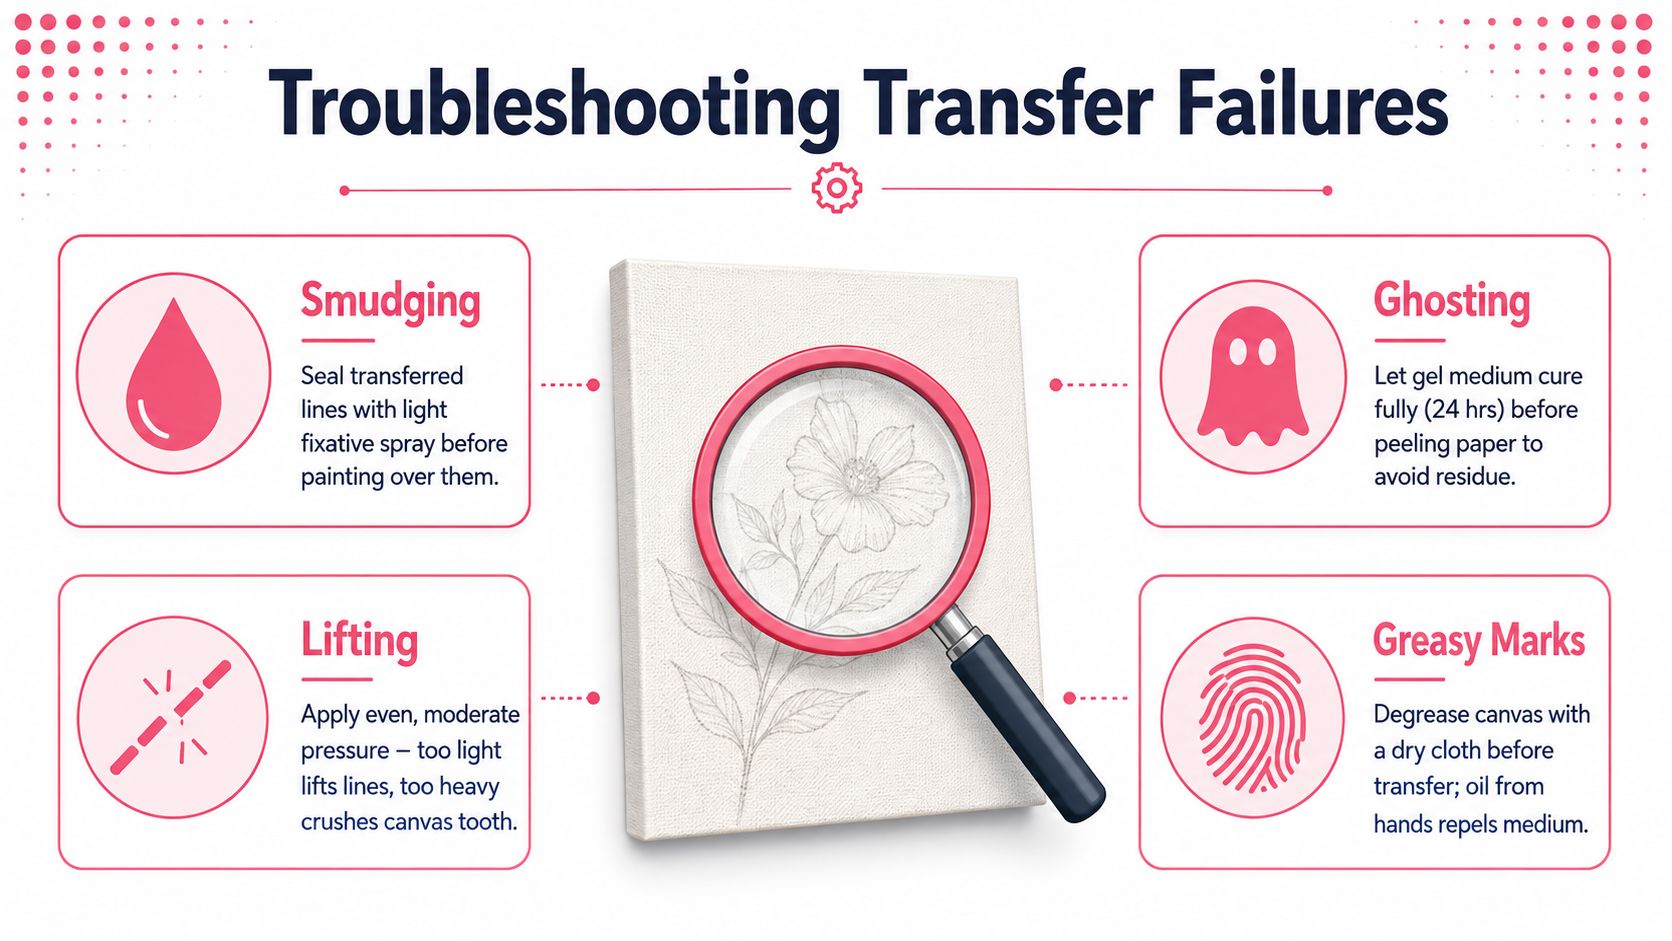
Smudging under a brush
If the line moves when your brush passes over it, the transfer wasn't secured. Let the surface dry, then apply a light workable fixative and allow it to flash off completely before painting. Don't scrub the area first. Scrubbing spreads the pigment and pushes it farther into the canvas texture.
Ghosting through light layers
A dark outline showing through pale acrylic or watercolor usually means too much pigment was deposited. Reduce pressure on the next transfer and use a harder pencil, such as 2H instead of 2B. On absorbent gesso, lighter is safer because the surface holds the mark instead of allowing easy removal.
If the current piece already shows ghost lines, try a controlled opaque underpainting rather than repeated erasing. Erasing can disturb the gesso and create a visibly different patch.
Paint refuses to adhere
Beading, crawling, or isolated slick spots can indicate wax or oil contamination from low-quality carbon paper. Switch to a wax-free option such as Saral and test it on a corner before transferring the whole drawing. Also keep your hands off the prepared surface as much as possible, since skin oil can interfere with later layers.
Marker nibs pick up dark pigment
A nib collecting graphite means the line remains loose or the ground is too porous. Add a thin matte-medium coat, let it cure, and test with a light-colored marker. If the nib still picks up residue, the transfer deposit is too heavy, and repainting or re-preparing the test area is safer than committing to the artwork.
The reliable sequence is simple: seal before you color. Your transfer should support the medium, not fight it.
Sealing the Transfer So It Works With Your Medium
Skipping sealant saves a few minutes and can cost an entire painting. A light workable fixative or matte medium layer holds graphite and carbon in the canvas tooth, reducing smudging under brushes and pigment pickup under marker nibs.
Use archival workable fixative for serious work rather than relying on casual hairspray. Hold the can at the manufacturer's recommended distance and apply two light passes instead of one soaking pass. Keep the can moving. A wet film can dissolve, pool, or darken the very lines you're trying to protect.
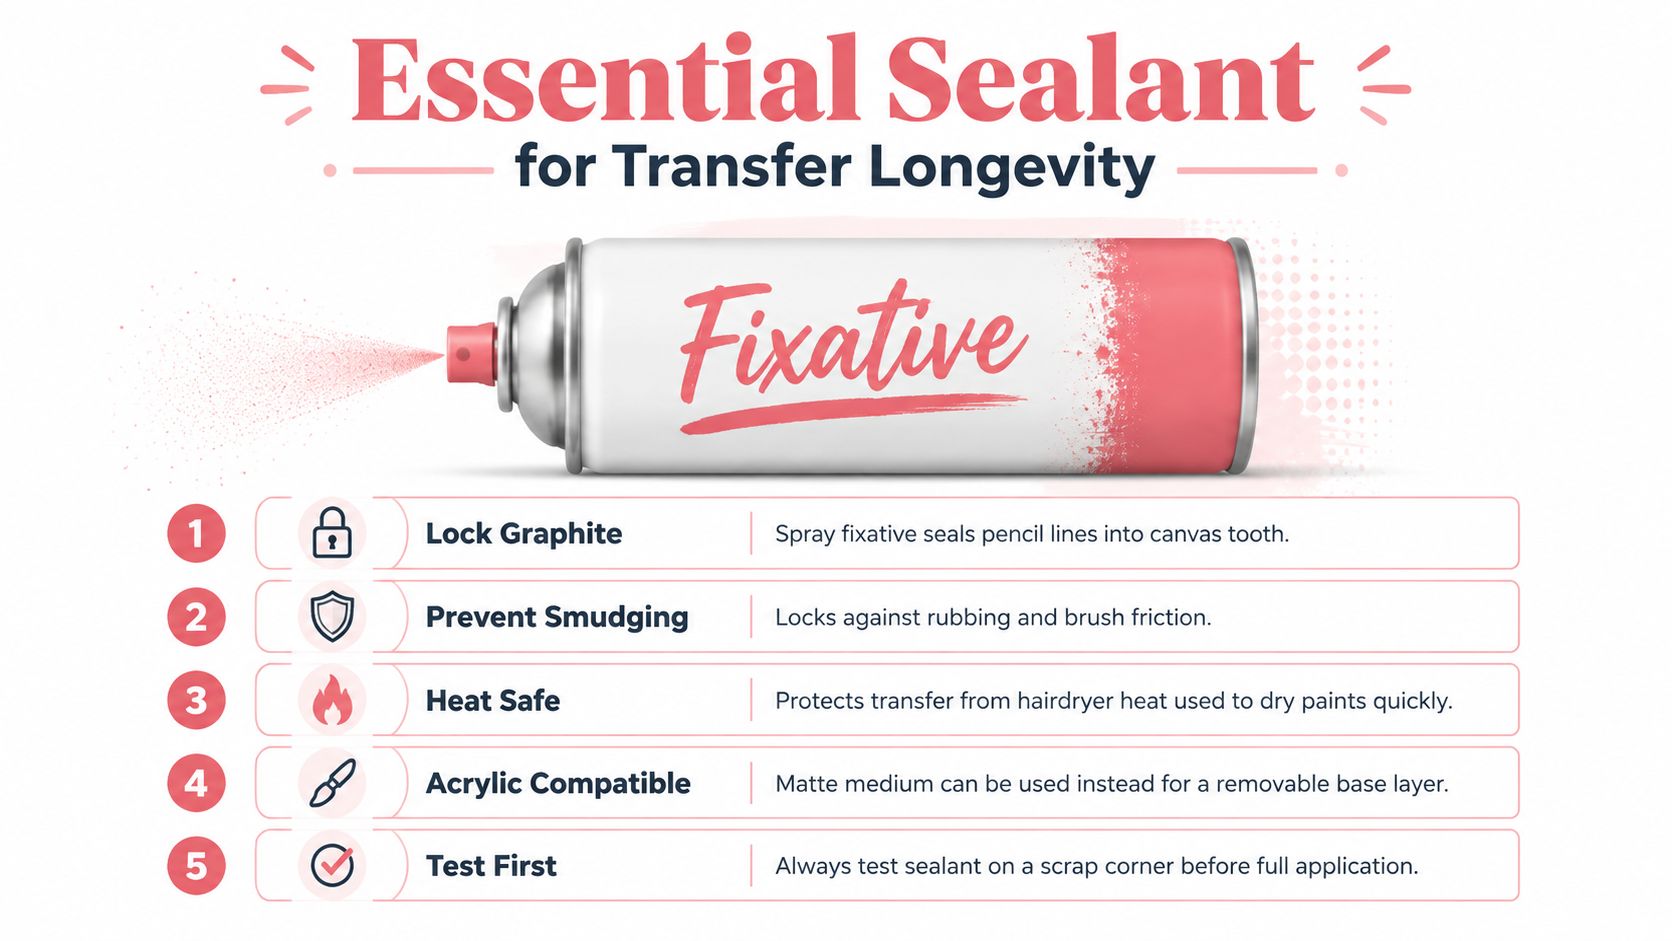
For alcohol-marker projects, a thin matte acrylic medium is often easier to control than a tacky gel. Brush it gently over the transfer and let it dry completely. For acrylic painting, a diluted matte medium can secure the drawing before paint begins. Retouch varnish belongs after paint layers have cured, not over a wet or unstable transfer.
Avoid three common mistakes:
- Sealing too soon: Wet graphite or damp gel can smear beneath the coating.
- Using gloss under markers: A glossy film may change how ink spreads and dries.
- Applying too much product: A heavy layer fills the canvas texture and can make the marker repel.
A quick test catches most problems. Seal a scrap corner, make a marker stroke, wait 30 seconds, and press tape onto the area before lifting it. If the stroke pulls pigment or the surface beads, change the sealant or preparation before touching the main artwork.
The DecoTime and Ohuhu color converter can help translate a planned palette between marker systems after your surface test has passed. Use it for color planning, then let the actual canvas test determine your final materials.
Transferring paper to canvas works best when you make the finish decision before the first tracing mark. Test the paper, ground, transfer pigment, sealant, and final medium together on a spare corner, then use the gentlest pressure and lightest line that still gives you a dependable guide.
ColorBestie lets you upload a sketch or coloring-page photo and generate a marker-style color preview with theme choices and marker-oriented color guidance. Visit ColorBestie to plan a palette before transferring your drawing, so your canvas prep and color decisions work together from the start.

